Tuesday, December 20, 2016

Philly Pedals Repost: Keeping Warm on Winter Rides

Note: This post was originally written for PhillyPedals.com and can be found here.


Now that we’re firmly held in winter’s icy grip, many people will feel the urge to put their bikes in storage for a few weeks.  Resist this urge!  Winter riding can be invigorating fun, and on top of that, it will help you to better appreciate the nice riding weather we have for most of the year.  I know it’s tough to get on a bike when the temperature is in the mid-20’s, so here are some tips for keeping warm that may help get you on the road:
  1. Layer Up – Don’t wear a parka and ski pants.  Wear multiple, lightweight layers.  Start with a base layer of thermal undies and work your way up to a jacket.  You’ll be warmer and more comfortable on your bike.
  2. Wick Away – Wear fabrics that hold in your body’s heat, while allowing your sweat to escape.  If you’re not a fan of synthetics, tight knit wool works great.  Avoid fabrics that hold water, such as cotton.
  3. Resist the Wind – A windproof shell will keep icy winds from wearing you down.
  4. Mind Your Dangly Parts – Extremities are the first casualties in the battle to stay warm.  Warm gloves and socks are a must, and on really cold days can be layered.  Mittens are the warmest option, but may hinder dexterity.  Lobster mittens provide the best of both worlds.  Headbands and helmet flaps are great for your ears, and both easily fit under your helmet, unlike a hat.  Your nose is tougher to keep warm, but on the really cold days, a full facemask is the way to go.
  5. Stay Hydrated – A properly hydrated circulatory system is far more capable of maintaining core and extremity temperature than a dehydrated one.  As a doctor friend of mine put it, “[Proper hydration] increases blood volume, and helps the circulation in your dangly parts!”
  6. Keep Moving, but Don’t Overexert – Moving your body will burn calories, releasing energy, and creating heat.  Yay, heat!  Overexerting your body will create a whole lot of sweat, which will then be cooled by the cold temperature around you, making you colder faster.  Boo, cold!  If overexertion is inevitable, make sure to only wear clothes that wick away moisture so you don’t freeze yourself in your own sweat.
  7. Avoid Prolonged Exposure/Take a Break – If your feet are numb and your nose is turning a dull shade of gray, get inside for a little while and warm up. You are only human; a fragile human that will only be allowed small victories while never truly conquering nature.
  8. Protect Your Skin – Moisturize and protect (SPF) your exposed skin.  A wind burned face, cracked hands, and chapped lips are a real turn-off.  Also, they’re irritatingly painful.
  9. Avoid Alcohol before Riding – Alcohol is a vasodilator.  As blood vessels expand, they lose heat more quickly.  Booze doesn’t keep you warm, it just tricks you into thinking that you’re warm.  Also, booze dehydrates you (see #5).
  10. Learn the Wim Hof Method – He climbed Mt. Everest in running shorts.  If you can learn how to do that, ignore 1-9.

Monday, December 19, 2016

Philly Pedals Repost: Take Advantage of Bicycle Co-ops

Note: This post was originally written for PhillyPedals.com and can be found here.


Off the Chain Bicycle Collective in Anchorage.
Bicycle co-ops (and collectives) are an invaluable resource while on tour. As not everyone knows what a co-op is, or what they do, I’d like to first lead you on a guided meditation to bring you into their magical world. Close your eyes and have the person next to you read this aloud:
You are riding your bicycle through a magical land. In this magical land, there are neither hills nor headwind. There are no honking cars speeding by, perilously close. Every road has two bike lanes and a single car lane. Dragons and Pegasuses (Pegasi?) frolic in the sky above you. It is truly a wonderful place.
But then an evil wizard appears! “Oh no,” you exclaim, for as we all know, the things evil wizards hate most are bicycles! “How dare you bring your non-automotive form of transportation to my mystical roads,” he bellows as a blinding flash is released from his wand. You are thrown from your bicycle, having been struck directly in the front wheel by his evil spell.
As you lay on the ground, half conscious, the wizard cackles, “Have fun riding with a broken spoke,” and disappears with a puff of smoke. Your mind clouds with unanswerable questions. How do I fix a broken spoke? Will I ever be able to ride again? Why do wizards hate bicycles so much?
Suddenly, you hear a voice, “A broken spoke is no work at all / We can help you after that wretched fall.” You turn and are face to face with a magical being that looks like a human that has been rolling around in grease and dirt. Sporting a wide smile, they say, “Hand out flat, eyes closed tight / Remember to tighten from left to right.” You close your eyes and open your hand and suddenly you feel an object in your palm. You open your eyes. It’s an enchanted spoke! A spoke that when touched imbues the knowledge of spoke replacement to the possessor! “Who are you,” you ask. “A humble helper, when wheels stop / Just a friendly face from your bike co-op.”
Neighborhood Bike Works in West Philadelphia. Photo courtesy of Shelly Salamon
Ok, you can open your eyes now and start reading for yourself (be polite and thank the person next to you). At this point, you should have a pretty firm understanding of what bicycle co-ops are and what they do. But just in case you don’t, a bicycle co-op is typically a community focused, not-for-profit, volunteer assisted bicycle shop that runs under the belief that teaching someone how to repair their own bike is far more important than the money that could be made from doing the work for them.
This teaching focus is why co-ops are so amazing for touring cyclists. Anyone that sets out on tour needs to know how to repair their own bicycle. There are going to be times that the nearest shop is hundreds of miles away, and if your bike breaks down, you either have to fix it or hope you can hitch a ride (with all of your gear). But you don’t work at a bike shop and YouTube videos can be tough to follow. How are you going to learn how to repair a broken derailleur cable?
For most people, myself included, the easiest way to learn how to do something is to learn hands-on. This is why co-ops are invaluable resources. A bicycle co-op is a fully stocked bike shop (stands, tools, etc.) with people (many times volunteers) there to guide you through bicycle repair. When you walk into a co-op with your broken down bicycle, they will not fix it for you. Instead, they will start by introducing themselves and getting to know you and your bicycle problem(s). Then you will be taken to a work stand (when one is available) where you will learn how to clamp your bicycle into place. After that, the two of you will look at what is exactly wrong with your bike, diagnose the issue, decide on the best course of action, introduce you to the tools and parts required to make the repair, and then guide you through the repair process. This way when you leave, you’ll not only have a bicycle that you repaired with your own two hands, you’ll have the knowledge of how to make the same repair later, should you ever run into the problem again.
Bicycle co-ops are also very helpful for repair veterans that don’t need assistance (or are too proud to admit it). Not only do they have workstands and tools that you may not normally have access to, they also have stockpiles of previously used parts as well as new, maintenance based parts (cables, housing, etc.) all for sale at reasonable prices. Did you need new pedals for cheap? They have some. What about new handlebars? They have those too. You name it, and they probably have a previously used version of it.
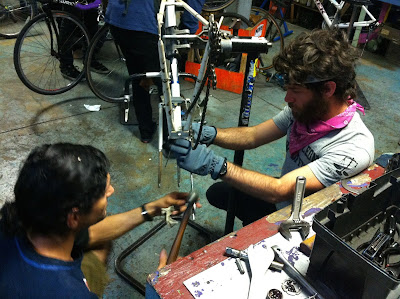
Help like this can be found at all bicycle co-ops and collectives.
Photo courtesy of Shelly Salamon
On top of all of that, bicycle co-ops have one thing that is not guaranteed at a bike shop: friendly assistance. At a regular bike shop, there’s no guarantee that you won’t be made to feel stupid for the questions you ask. It’s why I refuse to ask for help at Home Depot, and why many people can be scared away from getting that rusty old Schwinn out of the basement. Bicycle co-ops are focused on being patron-friendly. No question is ever stupid, and no person is unimportant. Additionally, co-op workers typically have a high enough self-esteem that they don’t need to condescend your knowledge level in order to make themselves feel better. They just want you help you to be a better, more confident mechanic.
Finally, bicycle co-ops (remember, they can also be called ‘collectives’) are everywhere! Most major cities have a bicycle co-op. So if you’re in the middle of a big tour, and your bicycle is acting a little funny, stop into one and give your bike a once over. Even if you don’t need to work on your bike, stop in to meet some friendly face folks with similar interests. In fact, start by going to your local co-op and introducing yourself. The co-op in Philly is Neighborhood Bike Works.

So in summary, bicycle co-ops are great places to go to learn bicycle repair before you set off on tour, to work on your bike even when you know what you’re doing, to get low cost, used parts, and to meet nice people with similar interests. And very importantly, when you leave, please do what all good bicycle co-op patrons do and donate what you can (on top of the cost of parts), as donations help keep the co-op open. If you can donate, but don’t, I hope a wizard curses your spokes.

Friday, December 16, 2016

Philly Pedals Repost: Review - Sinewave Revolution

Note: This post was originally written for PhillyPedals.com and can be found here.


Sinewave Cycles Revolution 
Photo courtesy of Sinewave Cycles
Dynamo, aka “generator,” hubs are a great way to power bicycle electronics. You never have to worry about carrying spare batteries for your lights, and if paired with a dynamo USB charger, you’ll never have to worry about keeping your smartphone/GPS charged. The problem I’ve found with dynamo USB chargers, though, is that the reliable models are not modestly priced, and the modestly priced models are not reliable. Enter Sinewave Cycles(formerly Brite-Bike Labs) of Cambridge, Mass.
At the Philadelphia Bicycle Expo, I was lucky enough to meet Dave Dean, the resident electrical engineer at Sinewave. I told him about the frustrations I had with the effectiveness (rather, lack thereof) of low-priced USB chargers, and then he told me about the Revolution. It’s a no-frills dynamo USB charger that is as functionally effective as it is solidly built, all at a very reasonable price. My old USB charger struggled to charge my phone, even with the wireless network disabled; the Revolution boasted “best in class” efficiency. My old USB charger burned out on a long downhill (Rabbit Ears Pass); the Revolution has high speed overload protection. My old USB charger was corroded after a few rainy rides; the Revolution has a gold-plated USB connector so it won’t corrode, and it’s 100% waterproof, so rain is no issue. On top of all that, it also has a one-year warranty on materials and manufacturing.
Needless to say, I was impressed by the specs, but I wouldn’t be sold until I gave it a try for myself. When a sample arrived on the Philly Pedals doorstep, I was eager to take it for a spin. Here are my test results, as well as some overview information about the rides:

Setup Info

  • Phone: LG G2
  • Hub: Shimano Alfine
  • Concurrent Power Draws: Supernova E3 Pro 2 Headlight, Supernova E3 Taillight
  • Installation Time: 5 minutes (less if you don’t have lights to add it to)

Test 1 – West Philadelphia to Aston and back (45 miles)

  • Duration: 5 hours
  • Starting Battery Charge: 95%
  • Final Battery Charge: 86%
  • Running Features: Mobile Network, GPS
  • Running Applications: Strava, Google Maps, Pandora
  • Results: The Revolution requires a constant minimum speed of 3.5 mph for a slow charge, and 9 mph for a normal charge. The first half of this ride involved a lot of stops and starts while riding through Upper Darby and other burby areas. The battery dipped to 81% at its lowest, but after a long stretch of no stop lights, it charged back up to 86%. Worked as described.

Test 2 – Oaks to West Philadelphia (25 miles)

  • Duration: 2.5 hours
  • Starting Battery Charge: 70%
  • Final Battery Charge: 82%
  • Running Features: GPS
  • Running Applications: Strava, Google Maps, Android Music
  • Results: On the ride out, I used all of the same apps and features as I did the day prior, except without having my phone plugged into the charger, and it drained my battery from 100% to 70% in 2.5 hours. Upon reaching Oaks, I plugged my phone into the charger, disabled my mobile network, and then switched from Pandora to locally stored music. Just by disabling the mobile network, I was able to get a 12% positive charge even with frequent stops and starts.

That little box delivers a lot of power, even when installed upside down.

Summary

After two days of riding with this charger, I was sold. It delivered a solid charge when maintaining a constant speed of nine mph, even while running GPS, the mobile network, and a bunch of apps (Test 1). When motion wasn’t constant, it was still able to charge up a phone with ease when the mobile network was disabled (Test 2). Also, please take note that all of this was happening while sharing the electricity from my value-priced hub with a 3.0 amp draw from my lights. There was no need for compromise with this charger; I could have everything running at once.
The Sinewave Revolution will enable you to maintain a full charge while running a GPS-driven ride tracker and streaming audio all day. That kind of performance should appeal to cyclists that enjoys long rides as well as commuters that like to pump up the jam on the way to work. Most importantly, it should appeal to everyone that realizes how important a charged phone can be in a tight spot.
Finally, in Sinewave news, they have just released the Reactor. This sweet baby fits into the top of your steerer tube (the top of your fork), making your bicycle one with the machine. It’s pretty slick.
Sinewave Cycles Reactor 
Photo courtesy of Sinewave Cycles

Thursday, December 15, 2016

Philly Pedals Repost: Staying Charged on Tour

Note: This post was originally written for PhillyPedals.com and can be found here.


Can't take pictures with a dead phone.
While touring, a smartphone can be invaluable. They are GPS-powered world atlases, making it impossible to get hopelessly lost (unless by design). They are never ending jukeboxes of all your favorite songs to help get you up grueling hills. They are a direct line to those close to you, no matter how far you get from them. But most importantly, they are the peace of mind you get from knowing that you’ll always have a plan B if it hits the fan (and it inevitably will).
The problem with smartphones, though, is their battery life is shorter than an ADHD attention span. Did I ever tell you about that time I saw a badger in Wyoming? It was on the side of the road eating roadkill. I can’t believe how much roadkill there is in America. If people had to eat all the animals they killed, they’d think twice before getting behind the wheel. Especially vegans. And once the battery is out of juice, it’s useless. This means your smartphone goal needs to be maximizing uptime. Luckily, there are a few ways to do that.
Economize Battery Usage
The biggest drains on your battery are the screen, the mobile network, and GPS-driven applications. If you plan on mapping your ride or having navigation software available, disabling the GPS isn’t an option, so we’ll ignore that one and just look at the other two. For decreasing the drain from your screen, lower both the brightness on your phone and automatic timeout setting. Also, don’t check your maps constantly. Take some time before you start or during breaks to get to know your route. Then you’ll not only save battery, but you’ll also spend more time noticing the real world around you than the digital one mounted to your handlebars.
Disabling your mobile network will be the biggest battery saver. When your mobile network is disabled, you’ll still be able to receive phone calls and texts, and your GPS will still function properly, but you won’t have access to the internet. Why would you need that anyway? GPS based apps, like Google Maps and Strava, will still function properly. One caveat is that Google Maps won’t be able to build new routes, so chart your route prior to disabling. This also means no audio streaming, so be sure to download any music or podcasts prior to setting out for the day.
Spare Batteries / Emergency Battery Chargers
Not many phones come with replaceable batteries anymore. iPhones definitely don’t, and most Androids don’t at this point. Samsung is an exception, along with some older models from other manufacturers. If you are lucky enough to have a phone that the battery can be easily swapped on, stock up on spare batteries. You can find two batteries plus a battery charger (which charges the battery outside of the phone) for $10 or so on eBay. With four extra batteries, you can rest assured that you can swap batteries during the day, and then charge with your external chargers at night. The nice thing about the external chargers is that they’re battery-specific and of minimal value, so the likelihood from them being stolen is slim. You can usually charge them in a camp site’s public bathroom without worry. Unless you’re in a methy area. Anything can be stolen when meth is involved.
Another option is an external USB battery pack. They are a little more expensive, but they will work with many different phones, so you can use them after you get a new phone. These will add weight, but you’ll be able to extend the life of your phone while riding, and then charge both your phone and the pack overnight. I don’t recommend charging them in public places overnight, though. A great way to charge overnight on the DL is in a campground that has RV hook ups. If you find an unoccupied camp site and use the electric hook up, which has enclosed outlets, not letting anyone know what’s inside.
Solar chargers aren't much help on days like this.  Another reason to not visit Ohio.
Solar Charger
Solar power is a good way to charge up your phone. Most solar panels work like the external USB battery chargers. They charge up during the day, and then you can charge your phone at night (or whenever). You could even use them to charge up your external battery pack too. They only problem is that they require sunlight, which will be at a minimum during a rainy season week. These are also fairly expensive if you want to get a good model. The big plus, though, is that they have a lot more applications than just touring, so you can take it on hikes, use it in the backyard, or anywhere else you want.
Dynamo / Generator Hubs
This is my preferred method of keeping electronics charged on the road. A dynamo hub is an easily affordable luxury that once you have it, you’ll wonder how you lived without it. For starters, you’ll never have to worry about your lights running out of power, which you will truly appreciate the first time you go on an extended night ride. As long as you’re moving, they’ll be lighting your path. Additionally, when combined with a dynamo-powered USB charger, you can charge any of your electronic devices (smartphone, GPS, beard trimmer, etc.). Just remember that it’s a bike, not a substation, so don’t expect to go from 10% to 100% charge in a few minutes.
Dynamo hubs come in a lot of different varieties, from a basic model featuring reliable functionality to high-end models that are packed full of overbuilt nerd features that make both bicycle enthusiasts and Electrical Engineers drool. As with most bike parts, you get what you pay for, so shop around online and leverage the knowledge of your local bike shop until you find that hub that works for your needs and your wallet.
Dynamo USB chargers, though, do not come in a lot of varieties. You are usually left with two choices: reasonably priced crap and really expensive high-end. I have used the reasonably priced crap. Take my word for it when I say it’s not worth it. You will fry it in no time flat. There are a few good options for high-end models (the Germans know their bike tech), but if you want a reasonably priced, high performing, American-made USB charger, I would recommend the Revolution by Sinewave Cycles. It has the output, reliability, and structural integrity (it works even when submerged in water) that rival the most expensive brands, but a price tag that is half of that of some of its competitors. For more about this brand, take a look at this Philly Pedals review.
People, in our hands, we hold devices that have unlimited potential. Potential to give you the freedom to get out and see the world while resting assured that you’ll always be able to find your way home.  So rather than using it to share one more uninteresting photo for your obsessively connected friends to pretend they like, use it to escape the electronic prisons that we have willingly confined ourselves to.

Wednesday, December 14, 2016

Philly Pedals Repost: Packing Light for Bike Touring

Note: This post was originally written for PhillyPedals.com and can be found here.


You can’t be a weight weenie when you’re on tour. At most, you can be a weight watcher (sans points). There are essentials you just can’t avoid, including water, food, repair kit, camping equipment, clothes, and possibly more (or less) depending on your route. You’re going to have to fight the urge to bring what you want, and instead bring only what you need.


What else do you need? (Fort Pierre National Grassland)
When you’re deciding what to bring, an easy way to figure out whether or not you should ditch an item is to ask yourself, “Do I want to carry this up a 7% grade?” A pair of jeans for when you’re in town? A full length chain instead of a few links?  An extra day’s worth of food? A lot of items sound like a great idea when you’re filling your panniers, but after a few hundred miles of not needing them, every time you drop into your granny gear you’ll be reminded of the extra weight.
Also, remember that ‘light’ is a relative term.  In a race, you worry about ounces. On tour, you’ll worry about pounds. So let’s take a look at a few areas where weight can be watched.
Shelter
  • Hotel/Motel/Holiday Inn/Say What? This is your lightest, but most expensive solution. Nothing to carry but a credit card. If you go this route, you’ll need to plan accordingly. Don’t assume that there will be a hotel/motel everywhere you go. FYI, the best place to check for bed bugs is on the side seam of the mattress.
     
  • Warmshowers.org/Couchsurfing.org: If you are unfamiliar with these sites, get familiar. Warmshowers is a website specifically for cyclists on tour looking for a place to stay. You can sign up, locate other members all around the country, and then coordinate a date that you could stay with them on your tour. Aside from getting a dry, warm place to stay, you’ll probably get a few meals and make some new friends. Couchsurfing is the same thing, except it’s for all types of travelers.  This method will take the most research, but could ultimately be the most interesting part of your ride if you’re a people person.
     
  • Tent/Tarp: You have a few options here. There is the ultralight (UL) backpacking tent, which will weigh in at 2 to 3.5 pounds and run up to $400 (GoLite, Big Agnes, other high-end tent manufacturers). There is a standard backpacking tent, which will weigh in from 4 to 6 pounds and shouldn’t be much more than $200 (REI, EMS, other store brands). There is also a bivy sack, which will be your lightest option, but is not for the claustrophobic. And then the lightest option is to forego any sort of shelter and sleep under the stars.  It would be wise to bring a tarp in case of rain. Additionally, you can forego a sleeping bag and sleep in all your warmest clothes. My personal preference is a sleeping bag.
A home for the well-rounded, tent-toting tourist.
Water/Electrolytes
These are the most important thing you’ll have on your tour. Nothing will knock you off your bike quicker than dehydration or an electrolyte imbalance. Unfortunately, water weighs in at about 2.2 pounds per liter. One way to keep your water weight down is to travel in somewhat well populated areas. If you can carry two 24-ounce water bottles on your frame, you’ll be able to get pretty far between water sources (convenience store, bathroom sink, unguarded dog bowl, etc). Otherwise, bring one (or two) two-liter dromedary/water bags. They add very little weight when empty, can be rolled up when empty to preserve space, and can be found at most outdoor equipment stores (Platypus makes a 70-ounce bag that weighs 1.3 ounces when unfilled.) Throw a full one of these in a pannier, and you’ll be good for a few hours.
Aside from water, you’re going to need to need electrolytes (otherwise you will get loopy quick). The lightest option is to buy Gatorade or another sports drink when you pass a store.  I don’t recommend this. Those drinks are loaded with sugar, which causes two problems: One, when people see you drinking them, they feel the need to get on their high horse and say, “You shouldn’t drink that, it’s pure sugar;” and, two, they get old quick. You can’t drink them for more than a few days without getting very tired of them.
The next lightest option will be electrolyte tablets, like Nuun, Gu, and others available at your neighborhood bike shop. Each tube usually hold a dozen tablets, weighing in at a fraction of what a single bottle of any premixed sports drink would.  They don’t have any sugar in them (typically), so you won’t get tired of them, and the bottles they come in can be reused to hold screws, quarters, or other small items.
Food
Nothing will make you more irritable than low blood sugar. Cars will sound louder when they pass you. Potholes will seem more frequent.  Pretty much everything will make you angry. If you find yourself in this situation, you have to eat something, otherwise you could go from pissed off to passed out in a few miles.
To save weight, carry as little food as you reasonably can. If you’re riding through towns, just carry a few snacks (energy bars, trail mix, fruit, etc) and stop for groceries or meals as you need them. If you’re riding in the middle of nowhere, figure out what you’ll need until you get back into civilization. If you carry some peanut butter, raisins, honey, and a few tortillas, you’ll have lunch for a couple days. Add some trail mix, and you’re living like royalty.  You want to be able to keep your energy levels up while keeping your effort levels down.
Clothing
Don’t worry about what you’re going to wear when you’re not riding your bike. It won’t matter. Does the thought of walking into a family restaurant in middle America while wearing a pair of “check your imagination at the door” riding shorts sound off-putting? You won’t care after a long day. Nothing disables your ego like exhaustion. You won’t even care that your shorts are covered in the day’s boogers because you were too lazy to use the hanky tied to your stem, and instead dove in finger first.
Bring the bare minimum for clothes. Take a “Noah’s Ark” approach for the daily essentials: two pairs of shorts, two shirts, two pairs of socks. Each night you can wash out what you’re wearing in a sink and then strap it to the back of your bike to dry in the morning.  As for other clothing, at a minimum, bring a pair of underwear to change into after you get off your bike (they will feel so freeing), a pair of shorts or light pants for walking around camp, and a warmer shirt/light fleece for when the sun goes down. If you’re riding in a colder climate, then you’ll need to bring warmer versions of the previously mentioned items. Also, in colder climates, sleep in a hat and socks. You will thank me in the morning.
Gear
This is the most variable section, but ultimately you’ll likely have three types: bike repair, camping, and toiletries. Here are some items you’ll probably need at a minimum, but the list is completely open to debate:
  • Bike Repair: tire levers and patches, spare tube, multi tool (or individual allen keys), lube, spoke wrench, spare spokes (one for each different length on your wheel set), chain tool, spare chain links
     
  • Camping: knife, spork, head lamp, (ultralight) sleeping bag, (backpacking) bed roll, 100% DEET bug spray (only if you, like me, are very reactive to bug bites), an eVent dry sack.
     
  • Toiletries: You know toiletries you (specifically) need, so let me just say that baby powder is a miracle. Chafing? Dirty hair? Smelly pits? It fixes it all. Also, bring a tube of chamois cream. Your crotch will thank you.
Ultimately, though, you can carry as much weight as you want.  If you don’t mind a few extra pounds for some added luxury, just bring it (stove + fuel + pasta + pesto + mandolin = romantic Italian dinner). If you bring something you don’t need, you can always mail it home (or donate it to a local thrift shop).

And let’s be honest, there are probably a few pounds you should trim off of yourself before you can start worrying about your bike.